Welcome to the second installment in our six-part series of user guides to SAP HANA. If you haven’t yet read the first article: SAP HANA Cloud Series Part 1 – How to Set Up the Environment —we’d recommend you go back and take a look before continuing. There’s a lot of useful introductory information that you won’t want to miss out on.
In this article, our main goals are to define table structures and roles, and then we’ll explore how to import data to the development space that we explained how to create in Part 1.
1. Creating a table
The first thing to point out is the different types of tables available in SAP HANA Cloud: ‘.hdbtable’ and ‘.hdbmigrationtable’.
The first, ‘.hdbtable’ makes an internal copy—which can increase the cost, as when a table is changed and deployed, the software performs the migration statements that are missing for the new version.
The last one, ‘.hdbmigrationtable’ uses explicit versioning and migration tasks. The modifications to the database are specified in the design file and carried out on the database table exactly as specified.
NB: For the purposes of this series of guides, we’ll be using ‘.hdbtable’ throughout.
So, let’s get started by creating a table. First of all we will create a folder to contain the tables— for this, go to the SAP Business Application Studio, right-click on the ‘src’ folder under your Workspace section and create a new folder.
The next step is to create the table itself. Press F1, type ‘HANA’ and select the option ‘SAP HANA: Create SAP HANA Database Artifact’ as shown below:
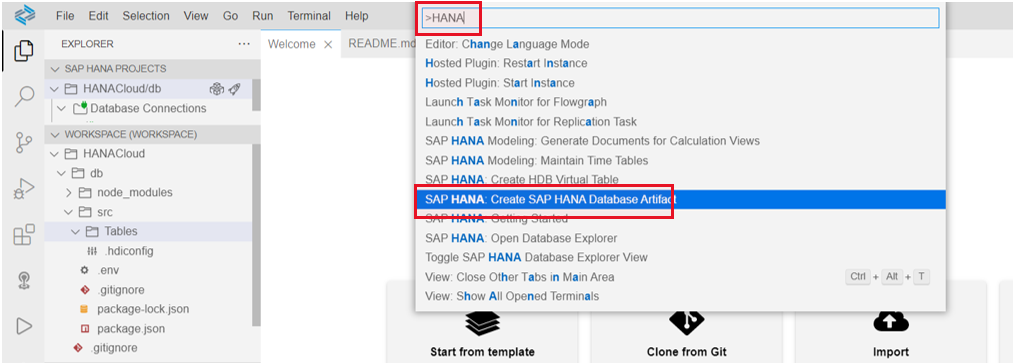
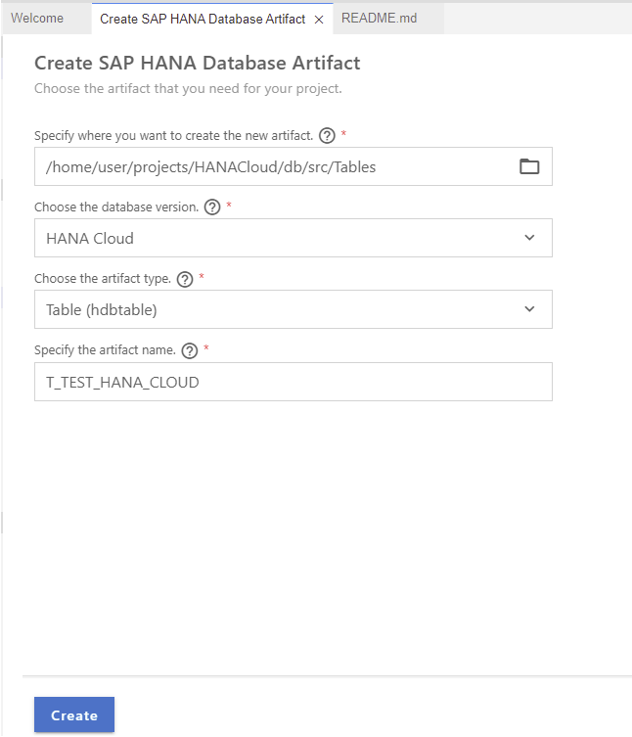
When you click on the option mentioned, the creation wizard will be opened. Specify the new folder you created previously as a source, the artifact type (which in our case is ‘Table’, but you can select ‘Migration Table’ if you prefer) and finally enter the name of the table, as in the screenshot here:
2. Defining the table structure
Once the table has been created successfully, it will be available in the explorer (on the left side of the SAP BAS panel). Double click the table name to open the definition. As the table has just been created, you’ll need to define the table structure, for example:
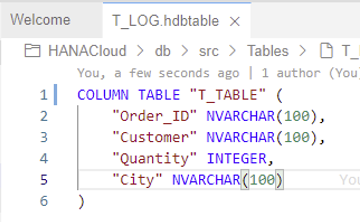
Note that in this case the table was defined as a column table. SAP HANA is optimized for column storage—achieving high-performing read operations while also maintaining good performance for write operations. In addition, some features are only available for column tables.

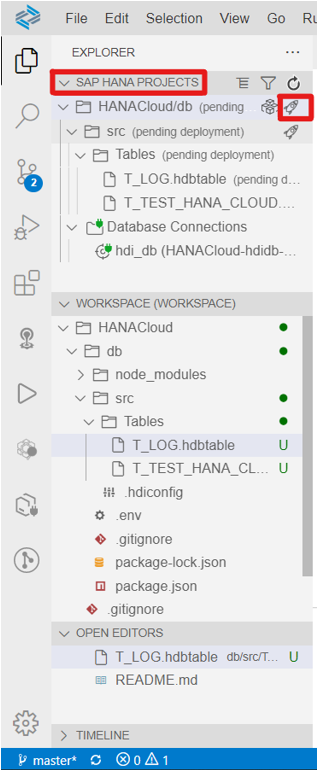
Once the definition is complete, you can move on to deploying the project. To do this, go to the SAP HANA PROJECTS tab and click, the rocket icon (🚀):
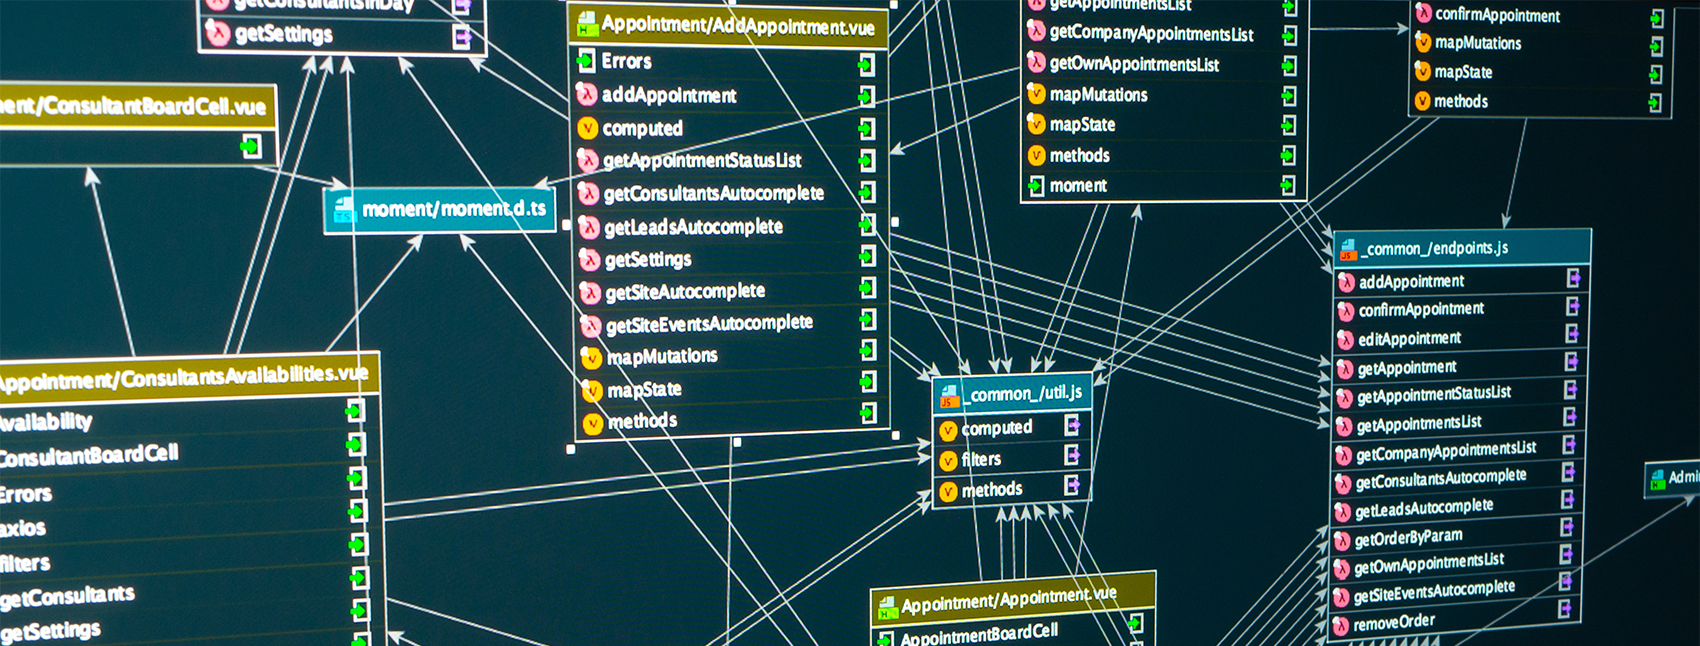
At this point, we’ve seen how to create tables, but please note that by following similar steps it is also possible to create any other Artifact available in SAP HANA Cloud such as calculation views, analytic privileges, flow graphs, etc.
3. Importing Data
Now that our table has been created, and we’ve correctly defined the structure, it’s time to populate it with the data we need. To do so, navigate to the SAP Business Application Studio and open the HDI container:

An HDI container is a service layer of the SAP HANA Database that manages dependencies, executes as a transaction, and consists of schemata and a set of users that together allow an isolated deployment of database artifacts.
When the SAP HANA Database Explorer is open, you can now expand the drop-down list of artifacts contained in the HDI. Notice that they are grouped by type, and so the table we created before should be under the ‘Tables’ category. Click on that category.
In the list shown below, right-click the table name and select ‘Import Data’, as shown here:

When you click on ‘Import Data’, the wizard will be open automatically. Select the ‘Import Data’ radio button and then click on ‘Step 2’. In the second step, you must select the source file (note that it can be a local file on your computer or cloud storage). Whatever file you import, make sure that it is in the comma separated value or ‘.csv’ format. Select the option you prefer, insert the file and click on the ‘Step 3’ button.
Here, enter the destination table name and click the ‘Step 4’ button. This is the most important step, as you need to correctly map the columns in your ‘.csv’ file with the columns defined in the table definition process. Make sure that both data types match and click on ‘Step 5’. Select the option you prefer and click on ‘Import Into Database’ in the review menu:

NB: The process mentioned above is just one of the options to import data to the tables. The alternative is importing data manually using an INSERT SQL statement. This is only possible if the table permissions are defined correctly. Defining these permissions will be explained in the next section.
4. Create HDBROLES
An HDBROLE is the way that SAP HANA groups the different privileges to perform database activities. Defining these roles correctly is a critical part of the system administrator’s responsibilities—in order to control access to and modification of the SAP HANA database objects.
The first step to defining these roles is to create a folder under the src folder where all the roles will be contained. Press F1 and ‘SAP HANA: Create SAP HANA Database Artifact’. In the creation menu select ‘Role (hdbrole)’ and configure the other fields as in the table creation section. Make sure to finish the role name with a ‘#’ character—this is compulsory for all role definitions.
On the definition menu, select the Object Privileges tab (as it will be linked to the table that has been created in previous sections) verify that the role name is in the correct format, and select the tables you want to apply for this role and the privileges. Finally, deploy the project again by clicking the rocket icon (🚀):

NB: There is another way to define the role, although it is less intuitive. By definition, the roles follow the JSON syntax, so it is possible to define it as a JSON file. If you prefer this option, open the role definition by right-clicking the ‘.hdbrole’ file of your workspace and Open With… > Code Editor. The definition described above translated to JSON syntax will look like the following:

That brings us to the end of this installment in the SAP HANA series. We hope you’ve found it a useful guide to the process of setting up, defining and populating tables. Look out for parts 3 and 4 which will be live on our blog soon—where we’ll go through the process of building up a Federated Scenario in SAP HANA.