
More and more organizations are realising the key role that data analysis plays in maintaining a competitive edge and meeting their strategic goals. But as the volume of data grows, the pressure on budgets increases, and the need for real-time analysis to allow data-driven decision making becomes ever more crucial, on premise data management solutions struggle to cope.
To face these new challenges, businesses are increasingly embracing data management in the cloud to achieve greater business agility.
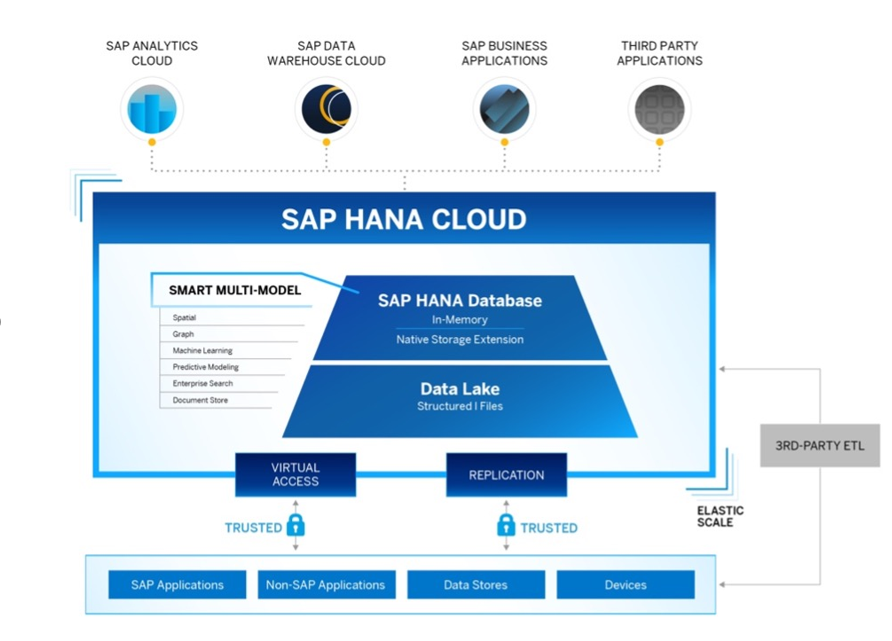
Here’s where SAP HANA Cloud comes in. It’s a database-as-a-service that offers the power and performance of SAP HANA natively in the cloud, including all the functionality you’re used to.
A cloud-based data warehouse allows you to scale within a few clicks—no need for a major migration project. In addition, your enterprise can access low-latency, advanced analytics and machine learning as a service.
If your data is stored in the cloud, you can access a wide range of services without installing anything on the infrastructure. And analysis on mobile devices is much easier as there is no need to use a VPN or similar network to ensure a secure connection.
Importantly, the SAP HANA Deployment Infrastructure (HDI) allows you to deploy database development artifacts to containers, it includes extended data storage (data lake), and provides a highly transactional, cost-efficient database—aspects which we’ll explore in this series of articles.
In this first article, we’ll look at the steps needed to set up an SAP HANA native application development space and project in SAP Business Application Studio.
1. Creating an SAP HANA Development Space and synchronizing it with GitHub
1.1 Create a development space in SAP Business Application Studio
The first step is to create a new development space in SAP Business Application Studio. For the purposes of this article, we have used a trial landscape.
Open SAP Business Application Studio, which is accessed through the SAP BTP Cockpit Trial Home page here: https://cockpit.hanatrial.ondemand.com/trial/#/home/trial

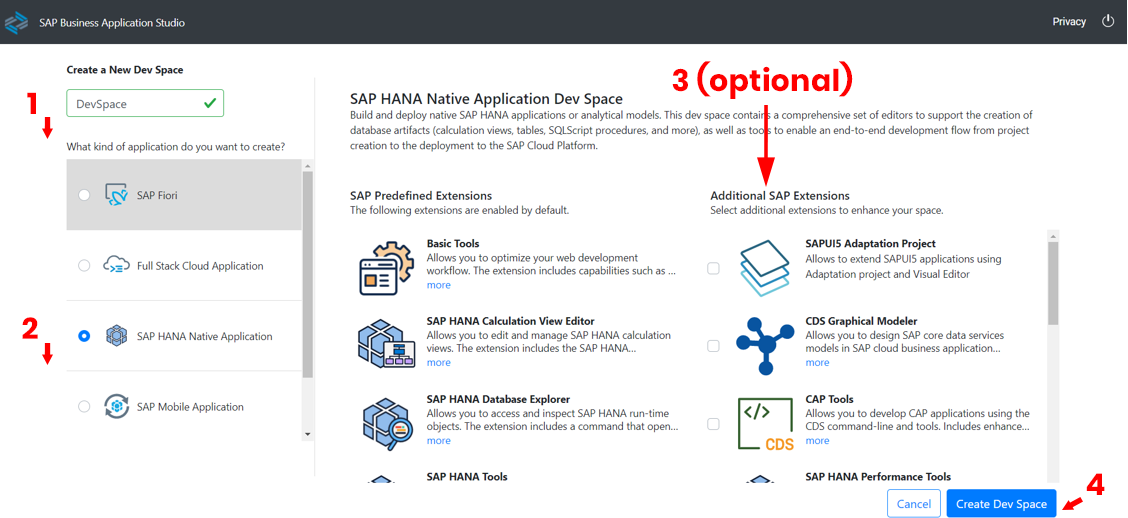
Once you are logged in, click the ‘Create Dev Space’ button and in the creation menu that will be automatically opened, first enter a name for the space, then select the ‘SAP HANA Native Application’ option, and if you don’t need to add any other extensions, click on ‘Create Dev Space’.
Note that it is also possible to start with another type of application and then add SAP HANA as an extension.
When you click the create button, a new window with all the Dev Spaces you have created will be opened. Wait until the states changes to ‘RUNNING’ and click on the name of the space to open it.

1.2 Link your GitHub account
The next step is to link your GitHub account to SAP BAS. To do that, go to Terminal > New Terminal and enter the following commands:
git config --global user.email "YOUR@EMAIL.com"
git config --global user.name "GITUSERNAME"
1.3 Establish SSH connection to git
Follow the process to link both accounts, and obtain your SSH key by typing the following command into the terminal:
ssh-keygen -t ed25519 -C "YOUR@EMAIL.com"
The terminal will ask for two additional configurations. Just press Enter twice to leave these as the defaults. Next, copy the location where the public key was stored and, after that, enter the following command:
cat location

Copy the entire line—the whole string is the public key you have just created. Once the public key is in your clipboard, go to the GitHub web page (https://github.com/), click on your profile photo on the top right, click on the ‘Settings’ option and follow the steps shown below:

When the key creation menu is opened, you need to enter a name, the key obtained from the Terminal and then finally add the key.
1.4 Create a GitHub repository
Next, you need to create a GitHub repository. Click on your profile photo once again (as in the previous stage) then select the ‘Your repositories’ option and click the green button labelled ‘New’.
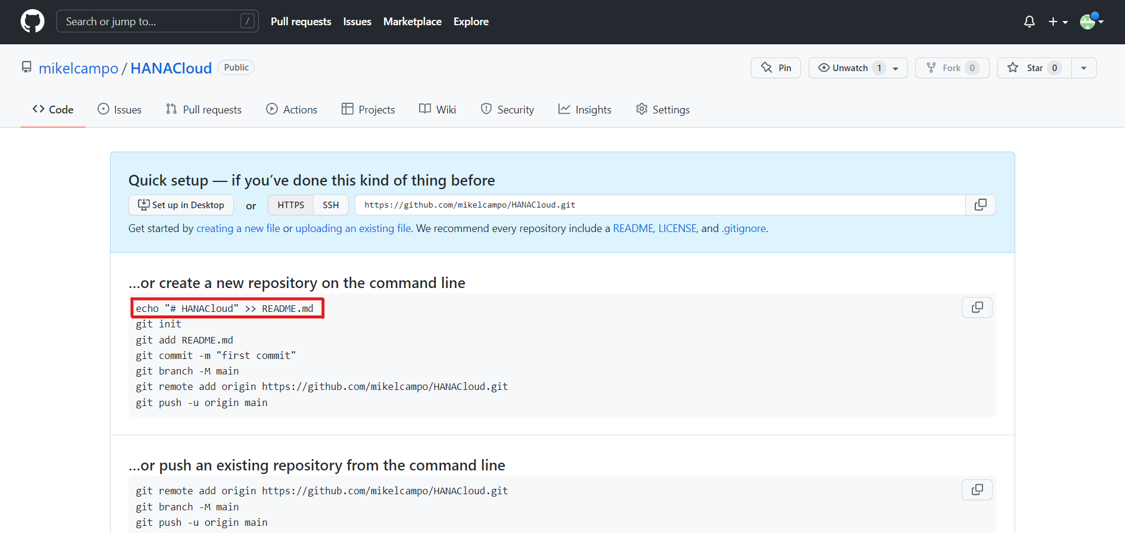
Enter the necessary information, set it up as public and click on ‘Create repository’. When you click to create the repository, a window like the one shown below will be opened. Make sure to save the first line as it will be needed in the next steps.
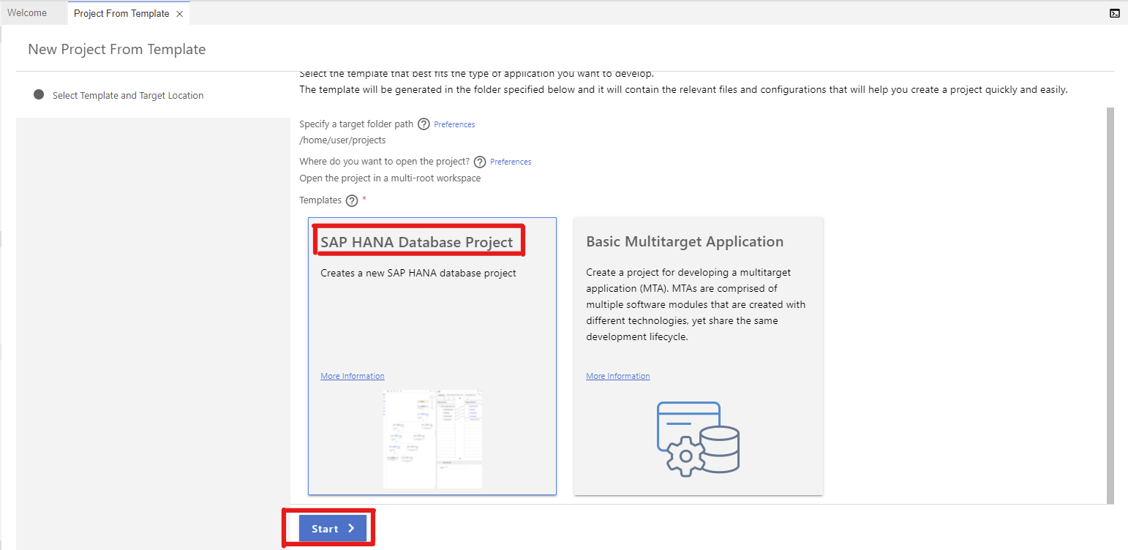
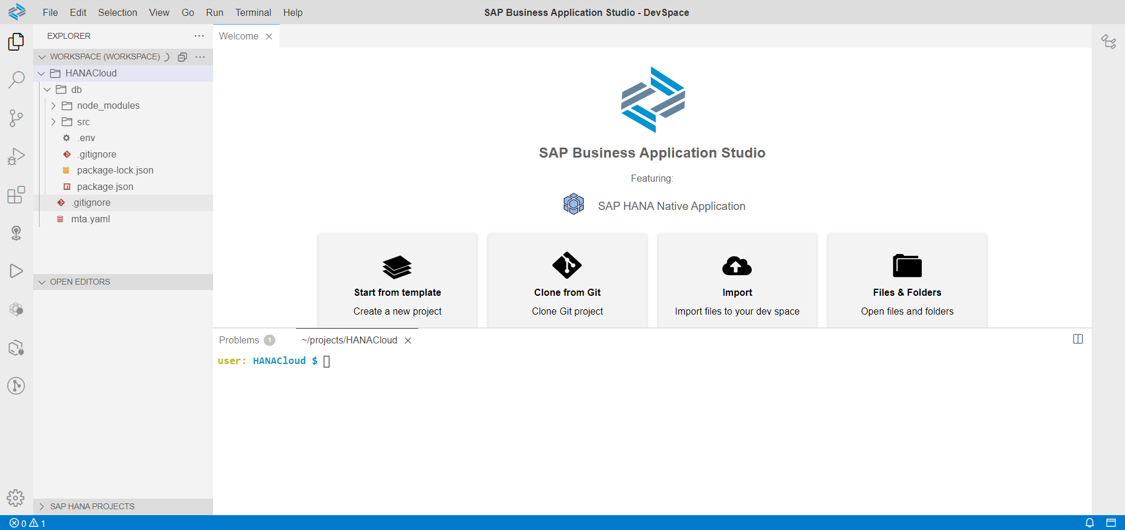
1.5. Create an SAP HANA Database Project
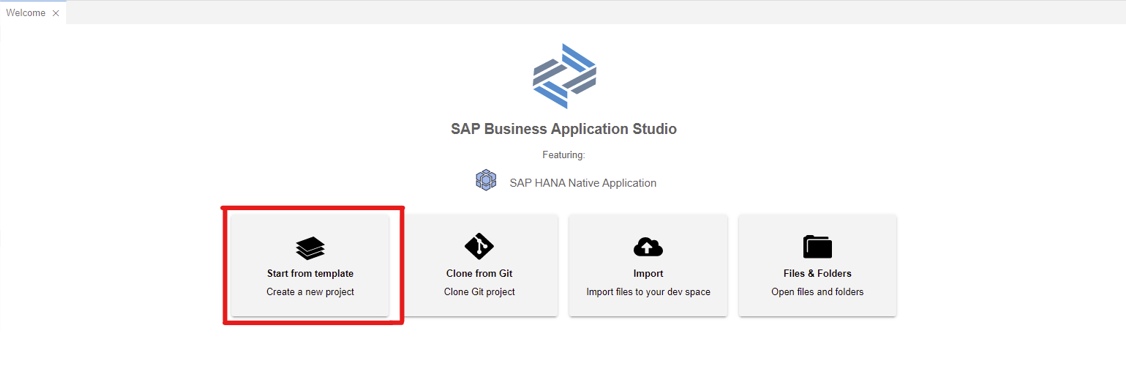
To create a new SAP HANA Database Project, first go back to the SAP Business Application Studio and select the ‘Start from template’ option on the Welcome page. From here, select ‘SAP Hana Database Project’ and then click ‘Start’, as shown below:
For the next three steps, fill out the necessary information as directed, making sure to select SAP HANA Cloud in the third one. In the last step, fill out the requested information, enter your password, click on the login button at the end of the password row.
Leave the options below as default and click ‘Finish’. When the creation operation finishes, it should show something like the following:
The last step is to establish the connection between the two instances you created and to align the contents between both sites. To do this, simply enter the following commands into the terminal:
git init
Command reserved
git add .
git commit -m “commit”
git branch -M master
git remote add origin git@github.com:Your Repository Direction.git
git push -u origin master
By following the steps and configurations described above, you should now understand how to create a Space and a SAP HANA project in SAP Business Application Studio and to connect it to a GitHub repository via SSH. Keep an eye on our blog for Part 2, where we’ll look at creating tables, roles and importing data.