
VPC (Virtual Private Cloud) peering is a feature offered by Amazon Web Services which allows you to quickly and easily group your AWS resources together in a single virtual network. This means that data transfer between resources is greatly facilitated, as you are able to use private IPv4 or IPv6 addresses to route data.
As a virtual network, created using the existing VPC infrastructure, there is no added potential for bottlenecking or hardware failure. Peering can be implemented between VPCs in the same AWS account or across accounts, and also cross region.
Use cases for VPC peering include:
Addressing a specific security need which requires you to separate functions using a VPC construct, while simultaneously requiring secure connectivity to other environments (for example, a Logging VPC).
Setting up a common server or set of services (for example an account with a deployed VPC or a separate deployed VPC in the same account, which is used to control the build/deployment across different Amazon Web Services accounts).
In this post we’ll illustrate how simple it is to deploy and configure VPC peering on AWS.
VPC Peering Configuration steps:
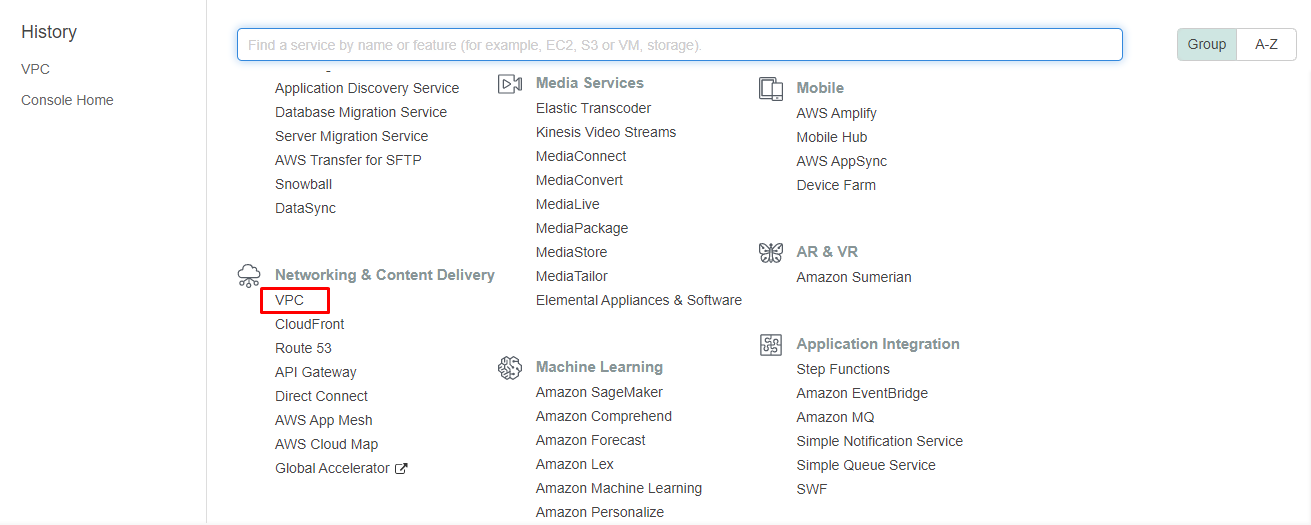
Please navigate to VPC service under Network & Content Delivery after logging AWS account.
Having logged into your AWS account and accessed the administration panel, click through to the Network and Content Delivery menu and find VPC.
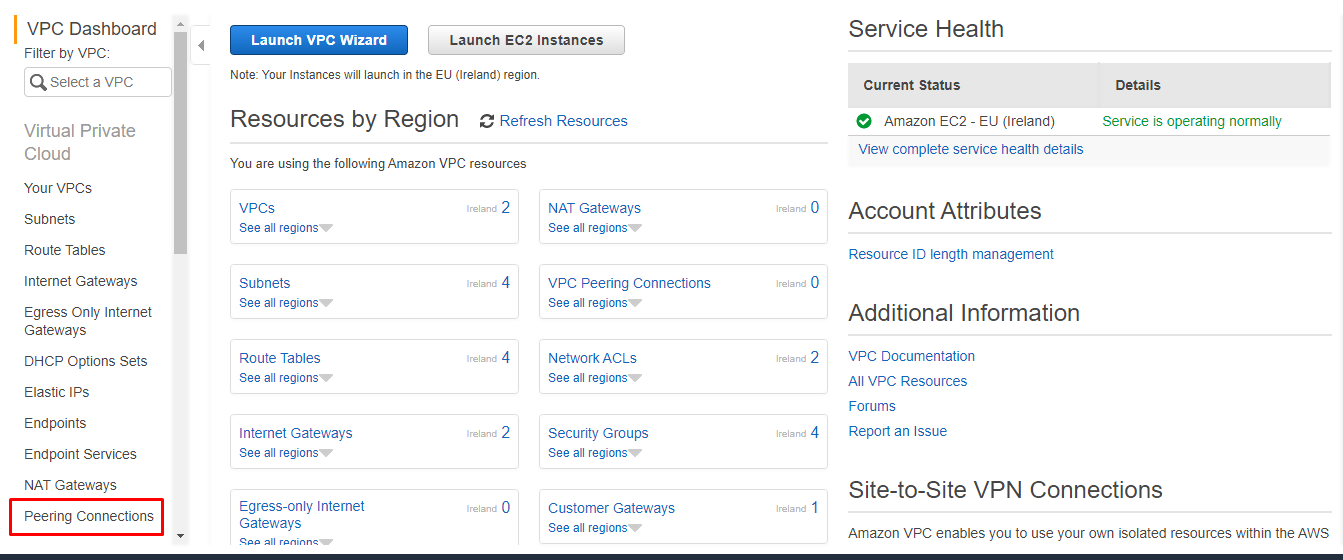
Within the VPC dashboard, select the menu option for Peering Services.
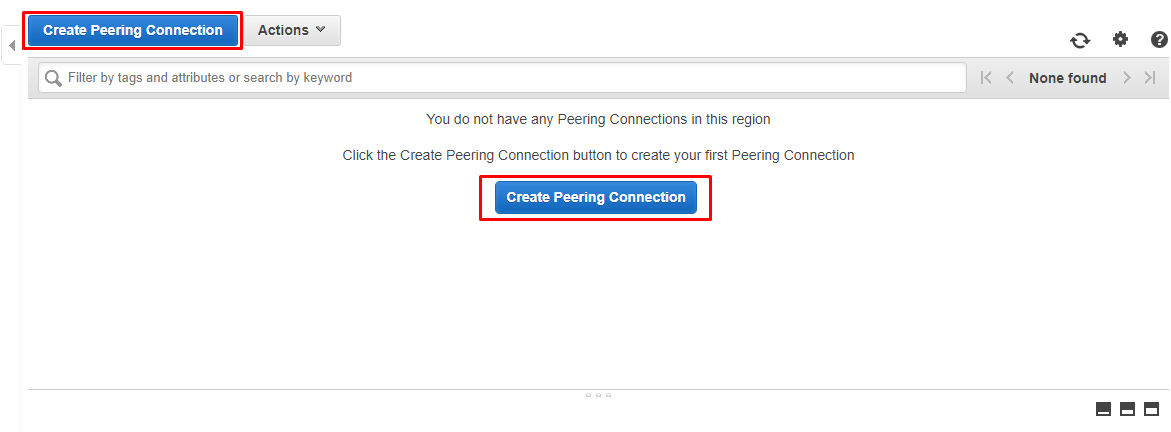
Click either of the Create Peering Connection buttons.
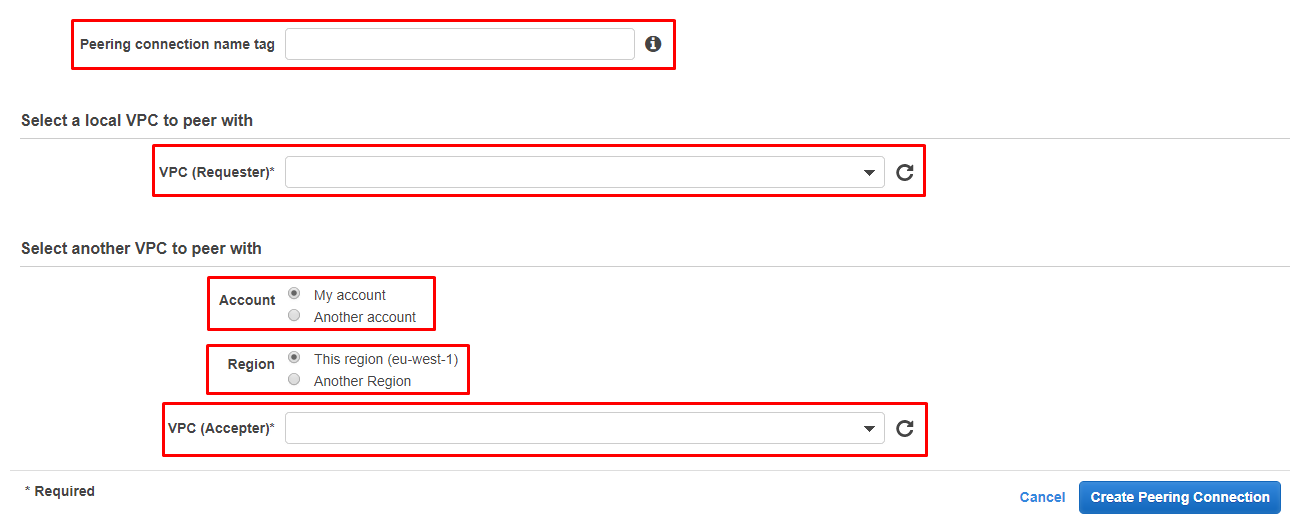
Create peering connection name, choose requester VPC, select another VPC to peer with options according to peering plan and Create Peering Connection.
On the next screen, you’ll be able to assign a name to the peering connection you are about to create. It’s advisable to use something descriptive, as this will help you to differentiate this connection from other peering connections you may create in future.
Once you’ve assigned a name, you can now select the local VPC to use in the peering connection - known as the “requester VPC”, and the VPC with which you want to connect it - known as the “Accepter VPC”.
You have several options available from which to select the accepter VPC, it can be within your account or another account, and you can also select whether it is in your region (current region is displayed next to the radio button) or another region.
When you’re ready and have filled in the necessary details, click Create Peering Connection to create your new connection.
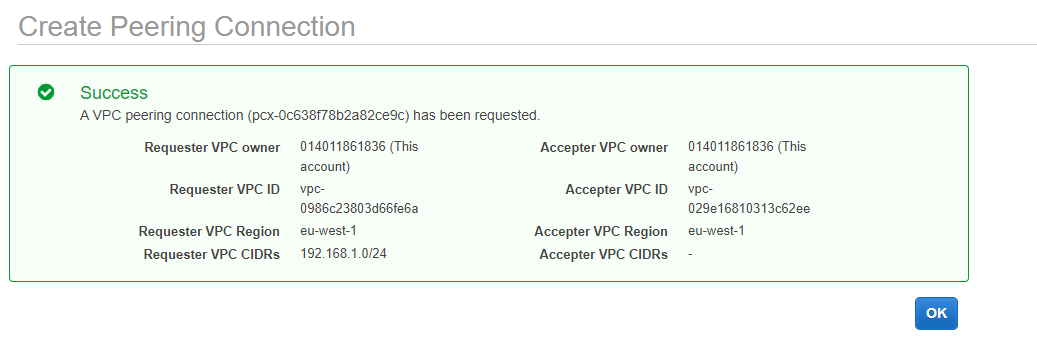
If all goes well, you should now see as screen with the message “Success” which displays the details of the connection you have created.
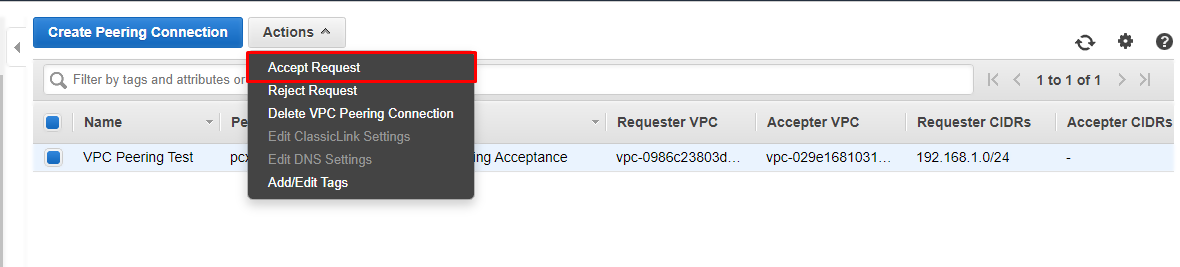
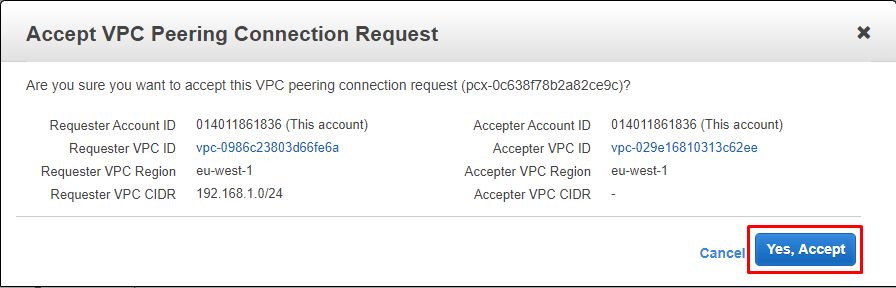
On the admin screen, you’ll see your VPC Peering request has been created under Requested VPC and shows the status Pending Acceptance. To accept the request, simply click “Accept Request”, which you’ll find under the Actions dropdown menu. You’ll see a confirmation window appear, just click Yes, accept to proceed.

Once you’ve accepted the connection you’ll need to modify the route tables. The correct configuration is shown below:
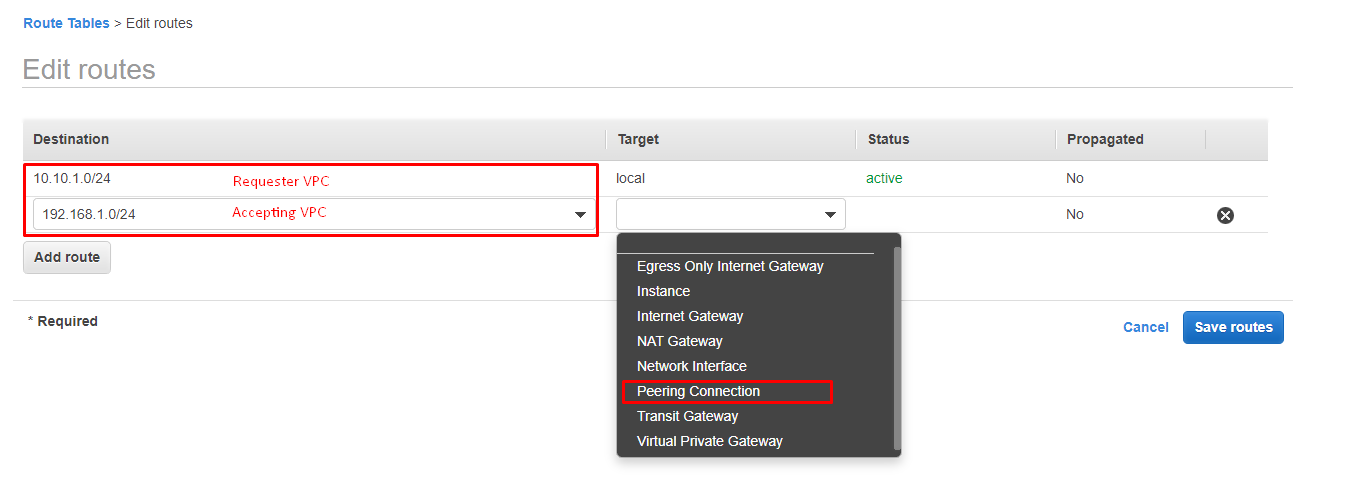
When you’ve modified the route tables, you’ll see that your connection is now showing as Active.

Congratulations, you’ve successfully set up VPC tethering for the first time. To set up new connections, simply repeat the steps above - it’s that simple.