
Picture1
In recent customer projects we have seen the need of having a machine with Unix-like architecture (more specifically Linux) ready for action. This is why we created a virtual machine with a Linux installation and proceeded with the challenge of a Business Objects 4.1 (although it should work for any other version) implementation on a Unix-like system. This post will present useful tips for starting a SAP BusinessObjects implementation on a Unix-like system and the steps you need to accomplish it.
Before you start reading this blog article, I would recommend reading our previous two articles about this topic. They should give you a pretty good idea on how this installation will go and also, give you a base to start with: Installing Business Objects on Linux – Part 1: Preparing Your System and Part 2: Managing Your System
Also, if you have access to the SAP portal, you can have the official SAP document and take a look at it or at least have it as a backup. You can find it in the SAP portal and it is called “sbo41_bip_install_unix_en”.
Now, lets start with the installation guide.
The base is to make sure to define and install (or have) the Unix-like system environment which you will work with. Also, define and choose the SAP BusinessObjects version that suits you.
It is advisable to have a minimum to medium level of knowledge around Linux administration and terminal console commands to facilitate the editing and comprehension of some of the steps mentioned below. Read the possible error messages and commands at the end of the document.
1. Make sure you have a clean installation of Red Hat Linux Enterprise 6.0 or newer (or an equivalent environment).
Linux
2. Login with root access to the system.
3. Make sure you have the correct rights for the installation files and users; if not you can use these commands (Google the commands so you understand what they do in case you do not) in order to achieve it:
chmod 777 folder1 folder2 …
And
chown 777 folder1 folder2…
4. Create a runtime user ready for the SAP BusinessObjects platform (BO from now on), such as BOADMIN and ensure it is member of the brand new BOBJ group.
groupadd BOBJ
useradd -G BOBJ BOADMIN
Or
useradd BOADMIN
passwd BOADMIN
groupadd BOBJ
5. Ensure you have downloaded both the
SAPBO4.1 and SAP Explorer Packages for Linux
in a Windows Platform.
6. Decompress the installation files in a Windows platform.
7. Make sure you move the decompressed files from Windows to Linux using
WinSCP
.
8. This means we have all the installation files stored in the following Linux folder, put it in:
/ BOADMIN /boinstall
Also create a new folder where the BO system will reside:
/ BOADMIN /bobj
9. Permissions to Source and Install folders: set execution and write permissions to the folders created previously for the source install files and the folder where BO will reside. To do that you need to run the following commands on the console as root:
chmod -R 755 /home/BOADMIN/boinstall /home/BOADMIN/bobj
chown -R boadmin:bobj /home/BOADMIN/bobj /home/BOADMIN/boinstall
10. Modifying Locale variables: ensure and update, if necessary, below locale variables are set up as follows:
export LANG=en_US.utf8
export LC_ALL=en_US.utf8
To make sure your variables are correctly set you can type “locale” on your terminal console. A listing with your available locale variables should pop up.
11. Set the ulimit configuration with the ulimit command, or modify the system configuration file /etc/security/limits.conf. That setting must be configured as unlimited.
ulimit unlimited
Or at least
ulimit 4096
12. Setting up Hosts file: go to /etc/hosts as root and open this file for edition. You will need to add a line to resolve your Linux system IP through the network and the name of your localhost machine. It should look similar to the following:
#yourIP machinename
Example: 192.168.0.1 linuxsystem
* If you do not have the proper rights for editing this file, go to the folder via command line as root and use “vi hosts” to edit.
There should already be a line for 127.0.0.1 which is the localhost or loopback network interface definition. Save the hosts file with the new line for your system.
To test that your hosts files line has been correctly setup, try to execute a ping command from the console to the name of your system:
ping machinename
You should receive a response if the hosts file has been set correctly.
13. Disable SE Linux: still logged in as root, modify the SE Linux functionality to permissive.

SE Linux functionality
Via command line:
Test if SELinux is running
You can test to see if SELinux is currently enabled with the following command:
selinuxenabled && echo enabled || echo disabled
Completely turning off SELinux
To completely disable SELinux instead of setting the configuration file to permissive mode you set it to disabled:
SELINUX=disabled
You will need to reboot your system or temporarily set SELinux to non-enforcing mode to create the desired effect like the example above.
14. Adding libstdc++ libraries. In some cases these libraries are not available by default. You can try to add them from the Linux repositories running the following commands (this will only work if you have added the repositories to the environment):
yum install compat-libstdc++-33-3.2.3-69.el6.i686
yum install compat-libstdc++-33.i686 0:3.2.3-69.el6
yum install glibc.i686
yum install libstdc++.i686
yum install libX11-1.3-2.el6.i686
In case you have not added the repositories download the .rpm libraries needed and use:
rpm --nodeps
nameoflibrary
.rpm
rpm -Uvh --nodeps nameoflibrary
.rpm when you need to install both versions of a library
* Libraries should be in 32-bits and 64-bits because the BO setup engine is 32-bits
15. The pre-requisite is having MySQL AB version 5.1.(MySQL 5.5 not supported on BI 4.0). If pre-requisite is met, create a database in MySql, for instance BI4, and account to store CMS configuration and system information. A second tablespace or scheme is required to hold auditing information, for instance BI4AUDIT, proceed in the same way. Record both databases names, tablespace, Server hostname, Port number (default is 3306), and account information so you can enter the details when prompted by the BI platform installation program.
Helpful Commands
CREATE DATABASE BI4;
CREATE DATABASE BI4AUDIT;
SELECT host, user FROM mysql.user;
SELECT host, user FROM mysql.db;
UPDATE mysql.user SET host = ‘
machinename
' WHERE host = '
internal
' AND user != 'root';
UPDATE mysql.db SET host = '
machinename
' WHERE host = '
internal
' AND user != 'root';
FLUSH PRIVILEGES;
Important Notes
Ensure that your database server is configured to use Unicode character encoding (such as UTF-8).
Ensure that the database accounts have privileges to create, modify, and delete tables, and to create stored procedures.
When using a database server on a network, the appropriate database client drivers must be installed and verified as working before installing BI platform.
Ensure that the host value of the instances is the same name of the machine.
16. Assign the right permissions to the installation folder and its subfolders in case you do not have them (the installer will tell you permission denied if this is the case); with the following command:
chmod –R 755 “foldername”
17. BO Installation. Log on as runtime user BOADMIN.
su – BOADMIN
cd /boinstall
cd BusinessObjectsServer_linux
Our BI4 install is unpacked and ready to go
./setup.sh InstallDir=/home/BOADMIN/bobj
Or
sh setup.sh InstallDir=/home/BOADMIN/bobj
The installation process is started. The order of the screens may vary depending on the version of the SAP BO that you are installing but they will be the same as the one listed here.
18. Setup language. Choose English.

Set up Language
19. Destination folder is previously prefixed to /home/BOADMIN/bobj
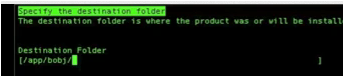
Destination folder
20. Next the pre-requisite check screen appears. If the installer detects that critical and optional installation pre-requisites are missing, a list of missing components will appear. Make sure that you install the correct libraries and repeat.
If necessary, resolve the critical pre-requisites issues before continuing the installation.
21. License Agreement screen: Validate your choice after reading the agreement.
22. User information screen: Type Product Keycode which is included in the SAP license webpage.
23. Select System Installation

System Installation
Choose Full Install Type:

Install Type
24. Choose Use an existing database server. Provide the following database server details:
MySQL database name
(sometime the installer assumes the names by default:
BI4
and
BI4AUDIT
; if this is not the case you will have to put them)
Server hostname
machinename
Port number
3306
Account username
BOADMIN
Account password
*******
Ensure
"Reset existing database"
is applied.
In addition, complete the configuration by providing the following details:
Select the database type to use for the CMS database.
Select the database type to use for the Auditing database (Auditing Data Store).
25. Select Java Web Application screen. Install Tomcat application server and automatically deploy web applications and services to it

Select Java Application Screen
26. Configure LifeCycle Manager screen: Install and use Subversion

LifeCycle Manager
27. SIA and Smart Server Configuration: Ensure node name is SIA and SIA port is 6410
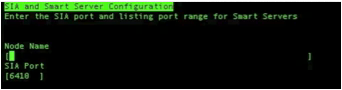
28. SIA and Smart Server Configuration
28. Configure Central Management Server screen: Ensure CMS port is 6400
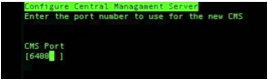
29. Configure Central Management Server
29. Configure CMS Account screen. Specify the password for the CMS administrator account and the cluster key

Configure CMS Account
30. Tomcat Port Configuration screen. Leave values as per default.
31. Subversion Configuration screen. Leave values as per default as specify the same CMS administrator account.

32. Subversion Configuration
32. Select “Do not configure connectivity to SMD Agent” in the following screen.
33. Select “Do not integrate connectivity to Introscope Enterprise Manager” in the following screen.

Do not integrate connectivity to Introscope Enterprise Manager
34. Installation will start.
Installation will start
35. After more or less 1h, at the tail of the install, the system prompts to complete the installation by running a handy script granting it with root permissions.

Complete the installation
36. We finish the installation by clicking [enter]
37. Once back to root, type the script suggested as post installation steps.
sh /home/BOADMIN/bobj//sap_bobj/init/setupinit.sh
38. Verify that the installation was successful by logging on to the Central Management Console (CMC). You can enter the web application server’s URL to access to the CMC.
Use the following URL:
http://<WEB_APP_SERVER>:<PORT>/BOE/CMC
Substitute <WEB_APP_SERVER> for the host name of the web application server and <PORT> for the listening port.
Log on as the Administrator user by typing Administrator into the “User name” field and entering the administrative password that you entered into the installation program.
If you have follow this steps (and did not find any other problem along the way – hopefully) you will have a clean UNIX BusinessObjects implementation ready to use. But, you may want to continue and install the SAP Explorer for LINUX. If this is the case, please continue with the steps listed below:
Installing SAP Explorer Application
Assign the right permissions to the installation folder and its subfolders in case you do not have them (the installer will tell you permission denied if this is the case); with the following command:
chmod –R 755 “foldername”
1. In the console, go to /BOADMIN/boinstall and launch the SBOP EXPLORER 4.1 installer:
./setup.sh InstallDir=/home/BOADMIN/bobj
Or
sh setup.sh InstallDir=/home/BOADMIN/bobj
2. Right after the "SAP BusinessObjects Explorer Setup” screen appears. Select English for the installation.
3. Specify the destination folder for the install. Ensure is the same installation folder that contains SAP BusinessObjects Business Intelligence platform 4.1.
4. Once again, a pre-requisites check screen appears. If the installer detects that critical and optional installation pre-requisites are missing, a list of missing components appears. If necessary, resolve the critical pre-requisites issues before continuing the installation.
5. License Agreement screen: Validate your choice after reading the agreement.
6. Do not select any extra language packs to be installed.
7. Select all the features to be installed on the directory specified earlier and press [Enter]
8.In the "Enter Information for existing CMS" screen, type the following information:
CMS Name
: [CMS name used in the installation]
Port number
: 6400
User Name
: [database user name used in the installation]
Password
: [database user name used in the installation]]
Press [Enter]
9. Enter node name as SIA and type 6410 as the SIA port for the existing local SIA
10. Press [Enter] to start the installation and wait until the process is completed.
On another note, you can find below some issues that you could encounter before, during or after installing both the Unix-like environment and the SAP Business Objects implementation.
Possible Errors
The clean Linux installation may be missing some libraries that the SAP BO installer will need. Download and install them following the commands in this guide. Remember to install both the 32-bits and the 64-bits libraries.
The order of the screens may vary depending on the version of the SAP BO that you are installing but they will be the same as the one listed here.
Missing Perl libraries or path.
When passing the files from Windows to the Linux Environment be aware that the folders must have the same names. Try using WinSCP instead of a pendrive. Make sure that, for example, the folder “cd /app/boinstall/BusinessObjectsServer_lnx/setup.engine/perl/lib/5.8.9/PVA.pl” is in CAPS.
It is possible that after installing you would not be able to login as Administrator in the CMC. This is an installation bug, and the fastest way to solve it is to reinstall until it is fixed.
Also, and this is as a bonus; some helpful commands that I have found useful within the Unix architecture. They may be helpful for you.
Helpful Installation (LINUX) Commands
su
su – USER
visudo (for editing the sudoers file)
vi file (for editing any file via command line)
top
./ccm.sh –enable all –cms “machineIP:CMSPort” –username username –password password
./ccm.sh –start all –cms “machineIP:CMSPort” –username username –password password
./ccm.sh –stop all –cms “machineIP:CMSPort” –username username –password password
./tomcatstartup.sh
./tomcatshutdown.sh
./startservers
./stopservers
ulimit
ulimit unlimited
ulimit 4096
ps –ef | grep “servicename”
service mysql start
service mysql stop
service mysql restart
mysql –u root –p
yum list *”servicename”*
rpm -e nameoflibrary.rpm
I hope that you find this guide useful for your Business Objects implementation in a Unix-system; and please, if you have any questions or anything to add to help improve this post, please feel free to leave your comments so we can help you.