On this article I will teach you in 12 steps how to load and read the information retrieved by a WebService based on a Java Application as a source of information. This is has a very important feature if for example you are building Java Social Media applications that read information from the Internet or if you have constructed a Java application that retrieves information in Json Structure XML. I will show you how Data Services makes requests and interprets replies from a web service Data Source.
If you need background information on the first steps of my process, I have done a first post on how to use Data Services SDK libraries to construct an AWTableMetadata in a Java application, followed by the post where I explained how to access a JAVA application as a source of information using the WebService DataStore in SAP Data Services.
If you already read my previous blogs, lets jump into how to load and read Web Services Data Store in Data Integrator.
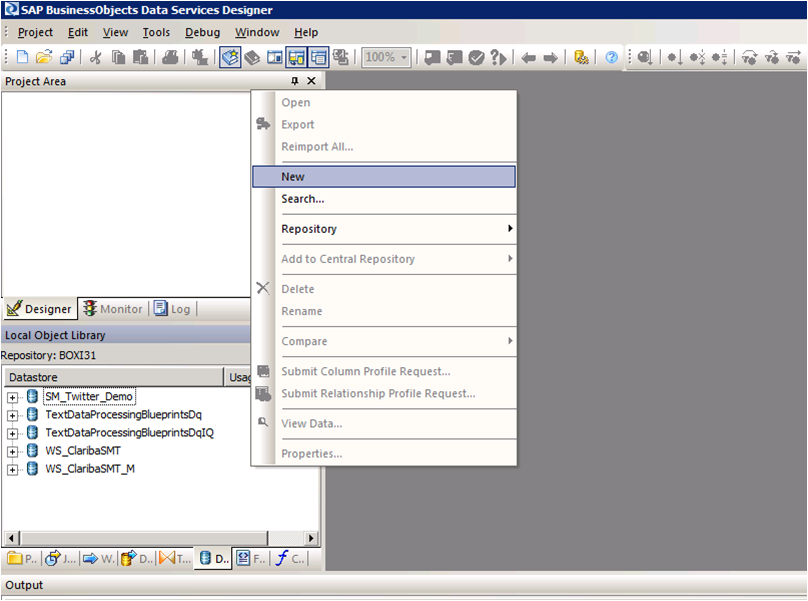
Step 1:
Open Data Services Designer. Go to the Data Store perspective and right click with the mouse and select New.
Step 2:
Set the name of the extractor and the URL where your web service WSDL is located (see my previous blog for reference).

Step 3:
Right Click on the “f(x)” symbol and select Import. Choose the functions from the webservice that you are going to use. In this example we select “getTableTweeetsEN” and “getTableTweeetsES”.

Special Note:
To access to these functions inside a transformation we have to use the function call Schema provided by Data Services. In this case the function getTableTweets_EN receive an input and returns a table (AWTableMetadata table). This return type comes in an especial nested form from our Web Service. We will have to resolve this nested schema doing a couple of transformations below.

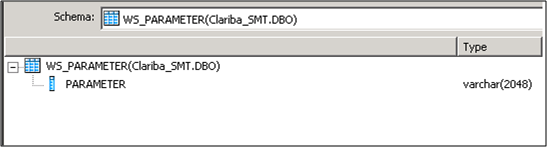
Step 4:
Select the input parameter for the functions; in this case it is a field from a table called “WS_Parameter”. We select that table as a Source table and our first item in our data flow.
Step 5:
Insert a transformation in the data flow as your second item. In this first query (Query1_EN). We create a SCHEMA called Schema 1, and assign the field came from the database “Parameter” as an attribute of this Schema.

Step 6:
Create a second transformation (Query2_EN). This query will be in charge of calling the web service with the input parameter using the Function Call procedure. Right click on the Schema Table called Query2 and select new Function Call.
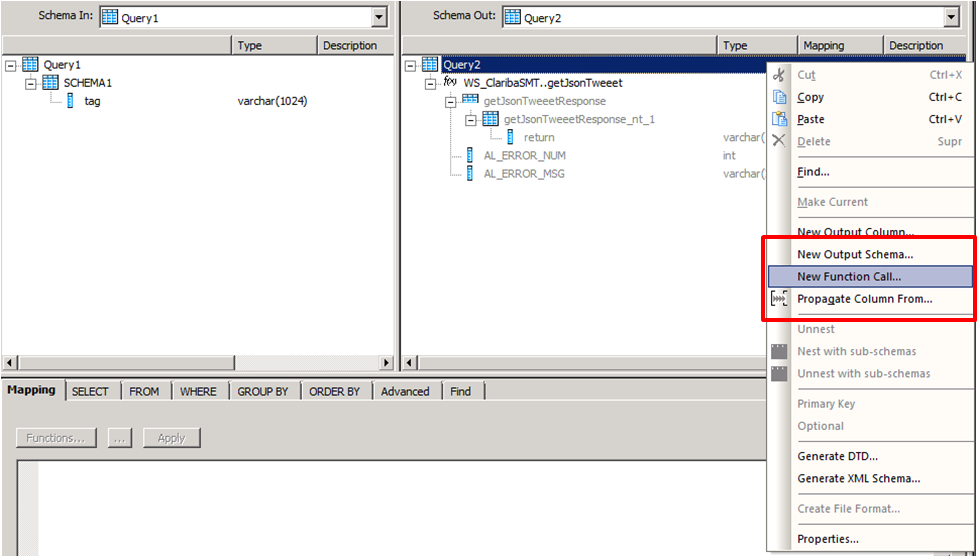
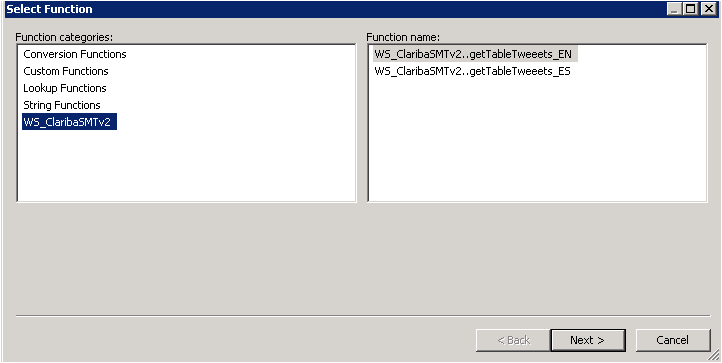
Step 7:
Select the WS_ClaribaSMT dataSotre in the left panel, the right panel shows the functions that we imported to the Data Store. We select the first one getJsonTweet (For English Language) and click next.
Step 8:
We have to map the new function call Schema with the new Schema1. This is the structure used to call a Web Service in Data Services. In this case we are calling the function getJsonTweets_EN with a parameter nombre. Structure that matches our SHEMA1. Then click Finish.

The final result will contain the function call. You can add also an attribute below the function call. In this case we add “load_date” containing the sysdate representing the date of the load data.

Step 9:
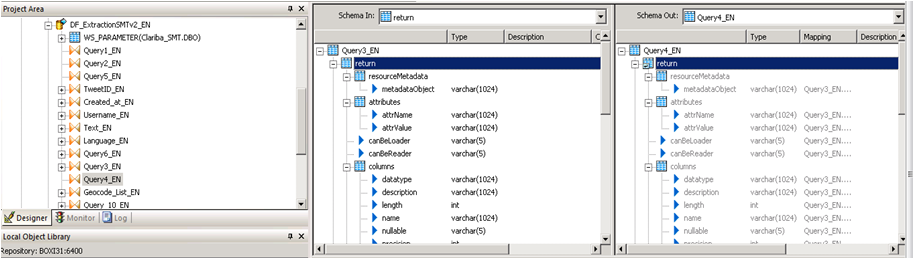
The third query will be in charge of the recognition of the data returned by the Web service. In this case the Schema is in the left panel. To capture this on Data integrator we need to unlace this Schema until we get to the “return object” which contains the Data.

We click on the left panel above the getJsonTweetResponse and drag it into the right panel. Then we do right click on the getJsonTweetResponse from the right panel and select the option “Unnest”. This will cause the split between the schemas. We proceed to capture it in the next nested query.

Step 10:
We do the same procedure in the query 4, drag the getJsonTweetResponse to the right and unnest it.
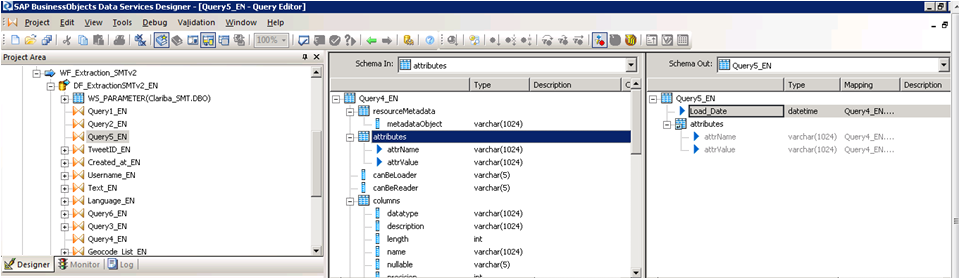
Step 11:
Query 5_EN contains the final result which be two variables that contains the header of the table plus the Load Date.
Step 12:
The last step depends on the implementation and the business rules. The table returned will have this format.
Column1
Value 1
Column 2
Value 2
Column N...
Value N…
Conclusion
This method applies particularly if you are using function call schema and an array as return type for your web service. If your source is another thing different to an application the resolution of the web Service may vary. The method for mapping the final table is up to you and your business needs. A easy solution could be aggregate an ID to each row.
If you want to have more information please read my previous blogs or leave a comment below.